Your Guide to Easy Hummus: Simple Ingredients, Amazing Versatility
Imagine a dip so lusciously creamy, so bursting with fresh, vibrant flavor, that it elevates every meal it touches. Now imagine making it yourself, in mere minutes, with ingredients you likely already have in your pantry. That’s the magic of homemade hummus, and in this comprehensive guide, you’ll discover exactly
how to make hummus that far surpasses any store-bought variety. From its humble origins in Middle Eastern cuisine to its incredible versatility on your dining table, preparing hummus from scratch is an experience in culinary delight that everyone can master.
For many, hummus evokes memories of family meals and shared plates. It’s a quintessential Middle Eastern dip, traditionally made by blending chickpeas with tahini, garlic, and lemon. As someone who grew up with it as a regular part of family meals, I can attest to its simplicity and profound satisfaction. Even if you don't consider yourself a kitchen expert, I promise, learning
how to make hummus at home is surprisingly easy and incredibly rewarding.
Why Homemade Hummus Triumphs Over Store-Bought
You might be thinking, "Why bother when I can just grab a tub from the grocery store?" The answer lies in taste, texture, and complete control.
1.
Unmatched Freshness and Flavor: Store-bought hummus often contains preservatives and stabilizers, which can mute its natural vibrancy. Homemade hummus, crafted with fresh ingredients, delivers a brighter, cleaner, and more authentic taste. The aromatic punch of fresh garlic and lemon, combined with good quality tahini, creates a symphony of flavors that store-bought simply can't replicate.
2.
Superior Creaminess and Texture: One of the biggest differentiators is texture. Our guide will show you techniques to achieve an unbelievably smooth and velvety consistency, often missing in commercial versions which can be gummy or dense.
3.
Control Over Ingredients: Making hummus yourself means you control the salt content, the type of olive oil, and can ensure it's free from unwanted additives or allergens. It's a healthier choice, packed with plant-based protein and fiber from the chickpeas.
4.
Cost-Effectiveness: Per serving, homemade hummus is significantly more economical, especially when buying dried chickpeas in bulk.
Once you learn
how to make hummus, you unlock a world of culinary possibilities. It’s perfect for dipping with pita chips or crunchy vegetables, spreading on your favorite sandwiches and wraps, or even as a base for more elaborate meals. Trust me, hummus truly does go on almost everything!
The Essential Ingredients for Perfect Hummus
Crafting the perfect hummus begins with understanding the role of each ingredient. The beauty lies in the simplicity of just six core components, with a few optional additions that truly elevate the experience.
1.
Chickpeas (Garbanzo Beans): The Heart of Hummus
These legumes are the undisputed star. While canned chickpeas can be used for convenience, for the absolute best, extra creamy, and authentic hummus, nothing beats cooking dried chickpeas from scratch.
*
Dried Chickpeas: Place 1 cup dried chickpeas in a large bowl, cover with plenty of water (they expand significantly!), and soak overnight. The next day, drain, place in a heavy pot, cover with about 2 inches of fresh water, bring to a boil, then reduce heat and simmer for 1.5 to 2 hours until incredibly tender. You should yield about 3 cups of cooked chickpeas. This extra step is worth the payoff in texture and flavor.
*
Canned Chickpeas: If using canned, drain and rinse them well. For an even softer texture closer to dried-cooked chickpeas, give them a quick 20-minute simmer in plenty of fresh water before proceeding. This helps break down their skins further.
*
Pro Tip for Ultra-Creaminess: After cooking (or simmering canned chickpeas), cover the warm chickpeas in water and gently rub them between your hands. Many of the skins will float to the surface; scoop them out and discard. This simple step, while optional, drastically improves the silkiness of your hummus. For more on achieving this texture, check out
Secrets to Super Creamy Hummus: An Authentic Homemade Recipe.
2.
Tahini: The Unsung Hero
This rich, nutty paste made from toasted ground sesame seeds is non-negotiable. The quality of your tahini will profoundly impact the flavor and texture of your hummus. Look for a brand that is light in color, pourable (not too thick or pasty), and has a mildly nutty, not bitter, flavor. Stir it well before using, as oil separation is natural.
3.
Fresh Lemon Juice: Brightness in Every Bite
Always use fresh-squeezed lemon juice. It adds a crucial tang and brightness that lifts the earthy flavor of the chickpeas, balancing the richness of the tahini.
4.
Garlic: Aromatic Foundation
Start with 1 medium clove of garlic, finely minced. Adjust to your preference – some prefer a stronger garlic kick, others a more subtle hint. Remember that raw garlic mellows slightly when blended but can be quite potent.
5.
Kosher Salt: The Flavor Enhancer
Just a pinch of kosher salt is enough to enhance and bring out the flavors of the other ingredients. You can always taste and add more to your liking.
6.
Extra Virgin Olive Oil: The Finishing Touch
A generous drizzle of high-quality extra virgin olive oil is the authentic way to finish and serve this dip. It adds a fruity, peppery note and a beautiful sheen. The better the olive oil, the better the final flavor.
7.
Optional Enhancements: Sumac, Cumin, Parsley, Ice Water
*
Sumac: A tangy, slightly citrusy spice that adds a beautiful red hue and complexity.
*
Ground Cumin: Adds an earthy warmth.
*
Fresh Parsley: A pop of green and freshness as a garnish.
*
Ice Water: A secret weapon! Adding a tablespoon or two of ice water while blending helps create an incredibly airy and creamy texture by emulsifying the tahini and olive oil.
Your Step-by-Step Guide: How to Make Hummus from Scratch
Ready to embark on your hummus-making journey? Here’s a simple, foolproof method.
Step 1: Prepare Your Chickpeas
If using dried chickpeas, ensure they are soaked overnight and then simmered until incredibly tender – soft enough to be easily squished between your fingers. If using canned chickpeas, drain, rinse, and simmer them in fresh water for 20 minutes to soften them further. This step is critical for a smooth texture.
Step 2: Peel for Ultimate Creaminess (Optional but Highly Recommended)
Once your chickpeas are cooked and still warm, immerse them in cold water. Gently rub them between your hands. The skins will loosen and float to the top. Skim them off and discard. This labor of love pays dividends in the final silken texture. For more expert guidance on achieving maximum creaminess, definitely check out
Master Easy Homemade Hummus: Creamy & Better Than Store-Bought.
Step 3: Begin Blending with Tahini and Aromatics
In the bowl of a food processor, combine the tahini, fresh lemon juice, minced garlic, and salt. Process for 1-2 minutes until the mixture is very light, pale, and creamy. This emulsifies the tahini and lemon, creating a fluffy base. You might even notice it lighten in color and thicken slightly.
Step 4: Add Chickpeas and Blend Until Smooth
Add the prepared chickpeas to the food processor. Begin blending, scraping down the sides as needed. While blending, slowly drizzle in 1-2 tablespoons of ice water. The cold water helps create a lighter, fluffier texture. Continue processing for 3-5 minutes, or until the hummus is incredibly smooth and creamy. Don't rush this step – patience here is key to texture. If it seems too thick, add a tiny bit more ice water until your desired consistency is reached.
Step 5: Taste, Adjust, and Serve
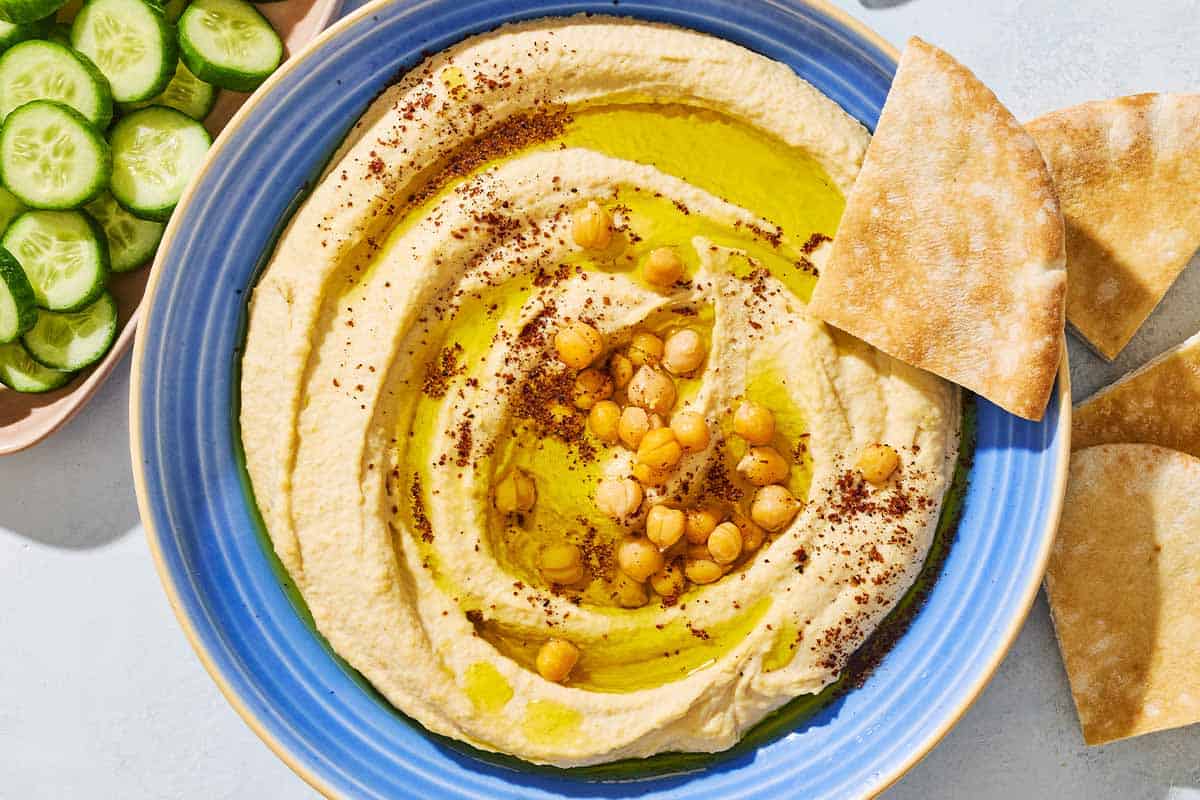
Taste your hummus and adjust seasonings as needed. You might want more lemon juice for brightness, more salt, or even another tiny clove of garlic. Spoon the hummus into a serving bowl. Create a shallow well in the center with the back of a spoon. Drizzle generously with high-quality extra virgin olive oil. Garnish with a sprinkle of sumac, a dash of ground cumin, a few extra whole chickpeas, or fresh chopped parsley for a pop of color and flavor.
Unleash Your Creativity: The Versatility of Homemade Hummus
Beyond its role as a simple dip, homemade hummus offers incredible versatility in your kitchen:
*
Classic Dipping: The perfect companion for warm pita bread, crunchy carrot sticks, cucumber slices, bell pepper strips, or celery.
*
Sandwich & Wrap Spread: Ditch the mayonnaise! Hummus makes a healthier, flavorful spread for sandwiches, wraps, and even burgers.
*
Base for Meals: Use it as the foundation for vibrant Buddha bowls, layered hummus bowls with roasted vegetables, grilled meats, or falafel. It pairs wonderfully with meatballs or as a side to a main dish.
*
Flavor Variations: Once you've mastered the basic recipe, experiment! Blend in roasted red peppers, sun-dried tomatoes, cooked beets, Kalamata olives, or even a swirl of sriracha for a spicy kick. The possibilities are endless.
Troubleshooting Common Hummus Hurdles
*
My hummus is too thick/gummy: Add a tablespoon of ice water at a time while processing until you reach the desired consistency. Ensure your chickpeas were cooked soft enough.
*
My hummus is bitter: This is almost always due to low-quality tahini. Invest in a good brand. Over-processed garlic can also contribute to bitterness, so use fresh and don't overdo it.
*
My hummus isn't smooth: Process longer! Scrape down the sides frequently. Peeling the chickpeas is the ultimate solution for silkiness.
In conclusion, learning
how to make hummus is more than just following a recipe; it's an invitation to a world of fresh flavors, superior textures, and endless culinary creativity. With just a handful of simple ingredients and a little patience, you can effortlessly craft a dip that will impress your family and friends and become a staple in your kitchen. So, skip the store-bought and embrace the delicious satisfaction of homemade hummus – your taste buds will thank you!