Master Easy Homemade Hummus: Creamy & Better Than Store-Bought
Forget everything you thought you knew about store-bought hummus. If you've ever settled for a tub from the grocery store, prepare for a revelation. Learning how to make hummus at home isn't just easy; it’s a culinary game-changer that promises unparalleled creaminess, vibrant flavor, and a freshness that simply can't be replicated on a supermarket shelf. This quintessential Middle Eastern dip, traditionally made from blended chickpeas, tahini, lemon, and garlic, is incredibly versatile and quickly becomes a staple once you discover the magic of making it yourself.
Whether you're looking for a healthier snack, a delicious spread for sandwiches, or a versatile base for more elaborate meals, knowing how to make hummus opens up a world of possibilities. It’s perfect for dipping with crunchy vegetables, pita chips, or even as a flavorful accompaniment to grilled meats and falafel. Even if you're a novice in the kitchen, we promise, this guide will empower you to create a batch of homemade hummus so good, you'll wonder why you waited so long.
Why Homemade Hummus Reigns Supreme
The allure of homemade hummus lies not just in its superior taste and texture, but also in the control it offers. When you learn how to make hummus from scratch, you dictate the quality of ingredients, the balance of flavors, and the perfect creamy consistency.
*
Unmatched Freshness: Store-bought options often contain preservatives and stabilizers to prolong shelf life, which can mute flavors. Homemade hummus, on the other hand, bursts with the fresh zest of lemon, the pungent kick of garlic, and the earthy richness of tahini and chickpeas.
*
Superior Creaminess: The secret to truly ethereal hummus often lies in careful preparation and blending techniques that are rarely scalable for mass production. We'll show you how to achieve that silky-smooth texture every time.
*
Customization: Love extra garlic? Want a spicier kick? Prefer a tangier finish? Making hummus at home allows you to adjust ingredients to suit your exact preference. You can also experiment with endless garnishes and additions, from roasted red peppers to smoked paprika.
*
Cost-Effective: Canned chickpeas and tahini are relatively inexpensive, making homemade hummus a far more economical choice than buying pre-made versions, especially if you consume it frequently.
The Essential Ingredients for Perfect Hummus
Mastering how to make hummus starts with understanding its core components. While the recipe itself is simple, the quality and preparation of each ingredient significantly impact the final product.
*
Chickpeas (Garbanzo Beans): The Star
Known as garbanzo beans, chickpeas form the bulk and creamy body of your hummus. For the absolute best, most authentic, and creamiest hummus, cooking dried chickpeas from scratch is highly recommended. This involves soaking them overnight and then simmering until incredibly tender – a small extra step with a huge payoff. You'll want them soft enough to easily smash between your fingers. If using canned chickpeas for convenience, give them a quick 20-minute simmer in fresh water to soften them further; this small step dramatically improves the texture. For more on achieving that ultimate smoothness, check out our guide on
Secrets to Super Creamy Hummus: An Authentic Homemade Recipe.
*
Tahini: The Flavor Foundation
This rich, nutty paste made from toasted ground sesame seeds is non-negotiable. The quality of your tahini is paramount and will profoundly affect the flavor and texture of your hummus. Look for a brand that is light in color, has a runny, pourable consistency (not thick and pasty), and has a pleasant, slightly bitter but not acrid, sesame flavor. Good tahini emulsifies beautifully, contributing to that desired creaminess.
*
Garlic: The Aromatic Punch
Fresh garlic is key. Start with one clove, finely minced, but don't be afraid to adjust to your taste. For a milder garlic flavor, you can briefly soak minced garlic in lemon juice before blending.
*
Fresh Lemon Juice: The Brightener
Always use freshly squeezed lemon juice. It adds a crucial brightness and acidity that cuts through the richness of the chickpeas and tahini, lifting all the other flavors. The amount can be adjusted to your preference – some like it tangier than others.
*
Extra Virgin Olive Oil: The Finishing Touch
A generous drizzle of high-quality extra virgin olive oil is not just a garnish; it’s an integral part of serving authentic hummus. It adds richness, depth, and a beautiful sheen. The better the olive oil, the better the overall flavor profile.
*
Kosher Salt: The Enhancer
A pinch of kosher or sea salt is enough to enhance the flavors of all the other ingredients. Always taste and adjust as needed.
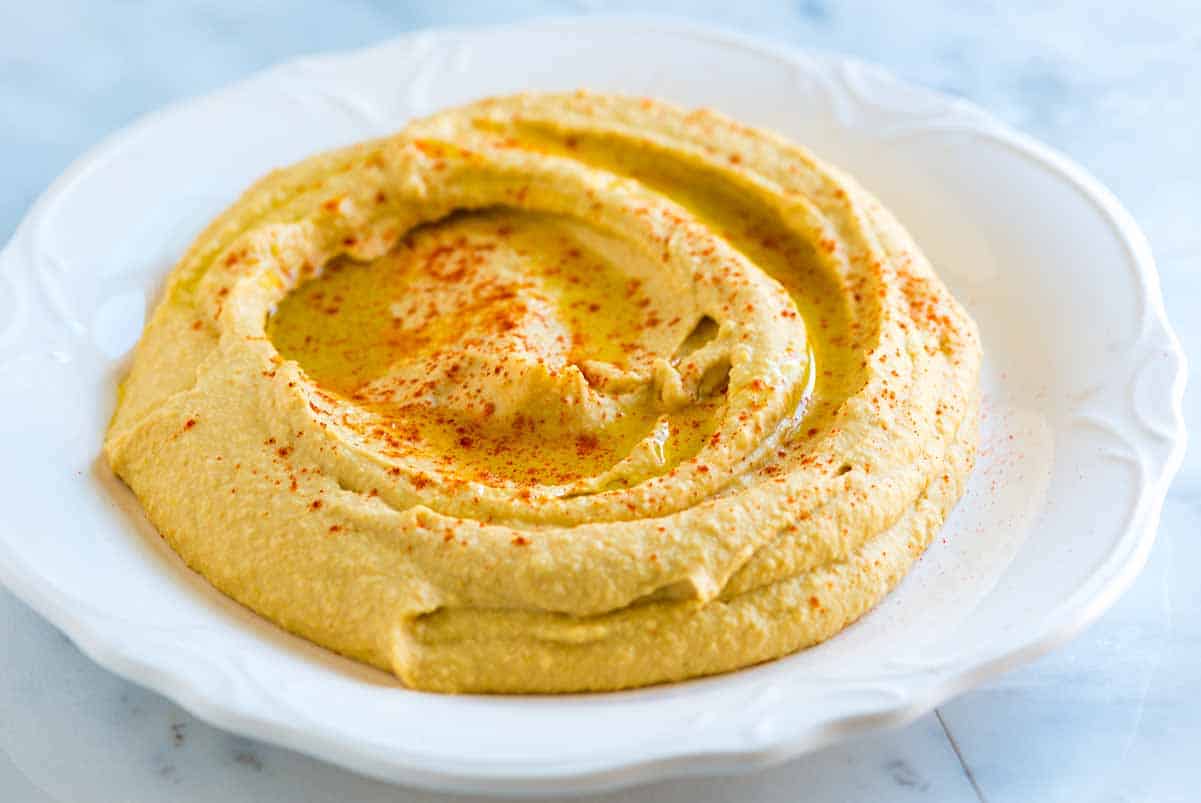
Optional Garnishes & Additions: Elevate your hummus with a sprinkle of tangy sumac, a dash of ground cumin, a handful of fresh parsley, or a few extra cooked chickpeas artfully placed in the center. A drizzle of hot sauce or a sprinkle of paprika can also add visual appeal and a flavor kick.
Step-by-Step Guide: How to Make Hummus at Home
Ready to dive in? Here’s your straightforward guide on how to make hummus that will rival any restaurant's.
1.
Prepare Your Chickpeas:
*
If using dried chickpeas: Place 1 cup dried chickpeas in a large bowl, cover with plenty of water (they will expand significantly), and soak overnight (8-12 hours). Drain, then transfer to a medium pot, cover with about 2 inches of fresh water. Bring to a boil, then reduce heat and simmer for 1.5 to 2 hours, or until extremely tender. You should yield about 3 cups of cooked chickpeas.
*
If using canned chickpeas: Drain and rinse one 15-ounce can of chickpeas. Place them in a pot, cover with fresh water, and simmer for about 20 minutes to soften them further. This is a crucial step for creamy hummus!
*
The Peeling Secret (Optional but Recommended for Ultimate Smoothness): For the absolute creamiest hummus, you can peel the chickpeas. While still warm, cover the cooked chickpeas with cool water. Gently rub them between your hands; the skins will loosen and float to the top. Skim off the skins. This step requires a bit more time but yields an unbelievably smooth result.
2.
Blend the Tahini and Lemon: In the bowl of a food processor, combine 1/2 cup good quality tahini and 1/4 cup fresh lemon juice. Process for 1-2 minutes until the mixture lightens in color and becomes thick and creamy. It might seize up a bit; this is normal and means it's emulsifying.
3.
Add Garlic and Salt: Add 1 finely minced garlic clove (or more, to taste) and 1/2 teaspoon kosher salt to the tahini-lemon mixture. Process for another 30 seconds to combine.
4.
Incorporate Chickpeas: Add the cooked, drained (and optionally peeled) chickpeas to the food processor. Process for 3-5 minutes, scraping down the sides as needed. The mixture will be thick and paste-like at this stage.
5.
Achieve Creamy Perfection (The Ice Water Trick): With the food processor running, slowly drizzle in 2-4 tablespoons of ice-cold water, one tablespoon at a time, until your desired creamy consistency is reached. The cold water helps to lighten the hummus and create an incredibly smooth, almost whipped texture. Some recipes also suggest adding a single ice cube or two to the processor along with the water for an even lighter texture.
6.
Taste and Adjust: Stop the processor, taste the hummus, and adjust seasonings as needed. You might want more salt, lemon juice, or even a touch more garlic. Process briefly to incorporate any adjustments.
Tips for the Creamiest, Most Flavorful Hummus
Beyond the basic recipe, a few expert tips can elevate your homemade hummus from good to absolutely phenomenal.
*
Don't Skimp on Tahini: Tahini is more than just a flavor; it's a key emulsifier and contributes significantly to the creamy texture. Use the full amount recommended.
*
Process Longer Than You Think: Many home cooks under-process their hummus. Let that food processor run! Blending for several minutes helps break down the chickpeas completely, creating a smoother texture.
*
Hot Chickpeas are Key: Adding slightly warm chickpeas to the food processor, especially if they’ve been freshly cooked or simmered, can help them break down more easily and contribute to a smoother final product.
*
Resting Time: Just like a good stew, hummus often tastes even better after an hour or two (or even overnight) in the refrigerator. This allows the flavors to meld and deepen.
*
Chill Your Serving Bowl: For an extra luxurious experience, chill your serving bowl before spooning in the hummus.
Serving Suggestions and Creative Uses
Now that you know how to make hummus, let your creativity be your guide! It's incredibly versatile.
*
Classic Dip: Serve with warm pita bread, pita chips, or an assortment of fresh, crunchy vegetables like carrots, cucumbers, bell peppers, and celery sticks.
*
Sandwich & Wrap Spread: Ditch the mayonnaise! Hummus makes a fantastic, healthy, and flavorful spread for sandwiches, wraps, and even burgers.
*
Base for Meals: Use it as a base for a layered dip, spread it on toast with avocado, or serve it alongside grilled chicken, falafel, or even scrambled eggs. For more ideas on its diverse applications, explore
Your Guide to Easy Hummus: Simple Ingredients, Amazing Versatility.
*
Hummus Bowls: Create vibrant hummus bowls with toppings like roasted vegetables, grilled halloumi, seasoned ground meat, or a generous sprinkle of feta and olives.
Learning how to make hummus is a simple yet profoundly rewarding kitchen skill. It’s an opportunity to create something truly delicious and wholesome from scratch, far surpassing anything you can buy in a store. With just a few staple ingredients and a little bit of love, you can consistently produce a creamy, flavorful dip that will impress your family and friends and become a beloved part of your culinary repertoire. So, go ahead, gather your ingredients, and get ready to experience the homemade hummus difference!